Overview: How to Email Large Files with Outlook
Welcome to Part 3 of our tutorial on how to send large files through email. Last time, we walked you through the steps of setting up the ad hoc file transfer service on JSCAPE MFT Server. Today, we’ll move on to the client side and show you how to set up the ad hoc file transfer plugin for MS Outlook. With this plugin, your users will be able to email large files with Outlook and its familiar interface.
The MS Outlook plugin can be downloaded for FREE from here. This version is compatible with Outlook 2010/2013.
After you’ve installed the plugin, launch MS Outlook. You should find our plugin’s custom widget sitting on the Outlook plugin, looking like this:

Let’s now start setting it up.
1. Set the connection and authentication details
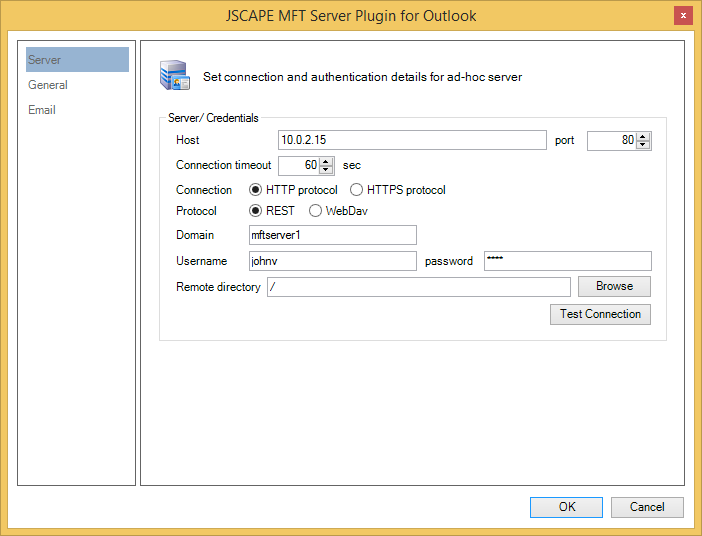
The first thing you’ll want to configure is the connection and authentication details of the ad hoc file transfer server. Go to the Server settings and enter the host/IP address and port number of your MFT server’s web service. In our example, this would be 10.0.2.15 for the host and 80 for the port number. If your MFT server’s web service is not yet activated, follow the instructions in the post How To Set Up A Web File Transfer.
Next, choose a connection type. The choices are HTTP and HTTPS. Your choice would depend on whichever type you activated when you set up your web service.
Select the REST protocol.
Enter the name of the domain on JSCAPE MFT Server on which the web service is running. In our example, it’s “mftserver1”.
When a user will send large files through email using this particular copy of Outlook, the plugin will actually upload the file to JSCAPE MFT Server and store it in an existing user account’s folder. You will have to specify that user account. Normally, that user account should be owned by the same person who would be using this particular copy of Outlook.
Enter that user’s username and password. Lastly, enter the relative path (i.e., relative to the user’s home directory) of the specific subdirectory where you want the uploaded files to be stored.
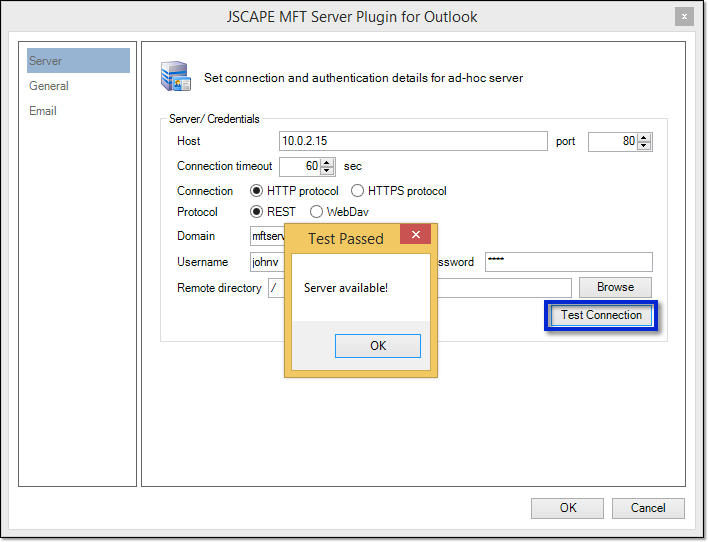
To make sure you can actually connect to your ad hoc file transfer server and login using the user account details you entered earlier, click the Test Connection button. If everything goes well up to this point, a Test Passed message should pop-up. Click OK.
2. Define basic plugin settings
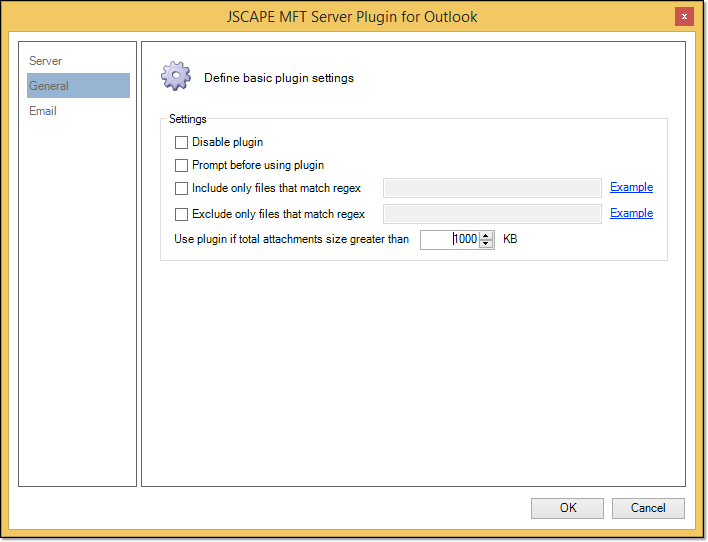
We now proceed to the General settings. This is where you can:
- temporarily disable the plugin;
- specify whether Outlook should prompt you first before using the plugin;
- specify which files will be included in your ad hoc file transfers. You can create a filter using regular expressions.
- specify which files will be excluded in your ad hoc file transfers. Again, you can create a filter using regular expressions.
- set a maximum file size limit within which the plugin shouldn’t yet be activated. When the user attempts to attach a file whose size is larger than this limit, ad hoc file transfer will automatically come into play. This is probably the only setting you’ll want to configure initially.
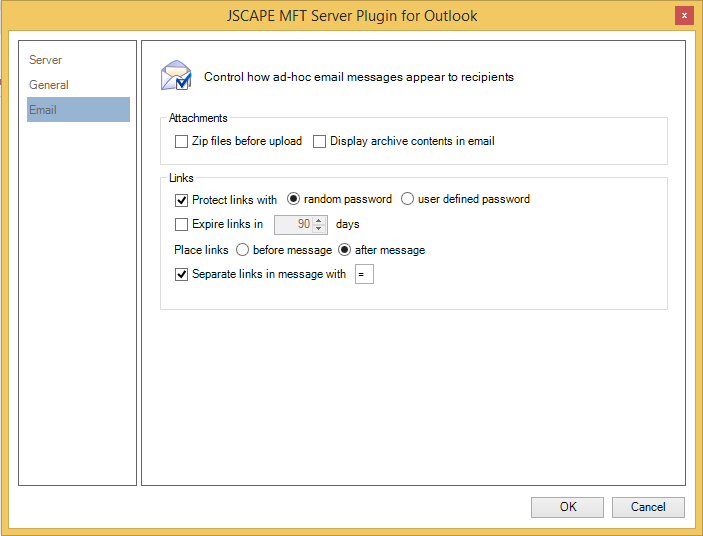
3. Control how ad hoc email messages appear to recipients
We now move on to our last group of settings – the Email settings.
Here, you can:
- specify whether your file attachments should be zipped before they are uploaded to the MFT server;
- specify whether the contents of the zip file should be listed down in your email;
- specify whether the download links should be protected by a password as well as whether the password should be system or user defined;
- set the number of days before the link should expire;
- specify whether the links should be placed before or after the email message; and
- specify whether the links should be separated by a symbol/character of your choosing.
Once you’re done setting all that up, click the OK button.
4. Start sending large files through email using the Outlook plugin
Now you can finally give this plugin a test run and see how easy it is to send large files through email.
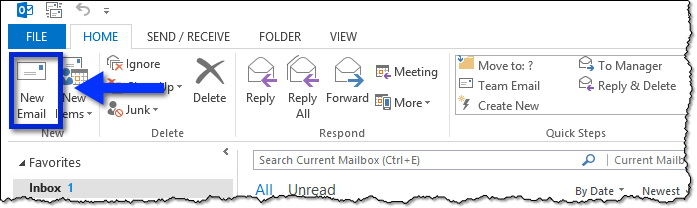
Start composing an email by clicking on the New Email button.
Enter the recipient’s email address in the To field. While you’re at it, also enter a subject in the Subject field.
Now, there are two common scenarios when you email large files using ad hoc file transfer:
- Those files are already stored on your managed file transfer server, and
- Those files are still stored locally, in the same machine that’s running Outlook.
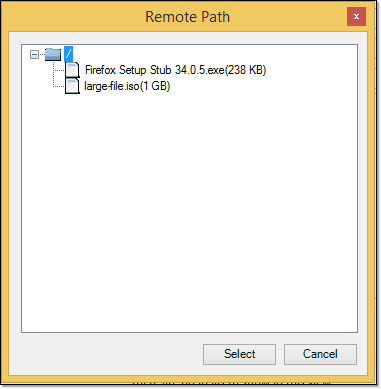
If you want to send large files under the first scenario, click the Attach Remote File button.

This should bring up a pop-up window that will show you all the files and directories under the user account you specified earlier. Select the file(s) you want to send and then click the Select button.
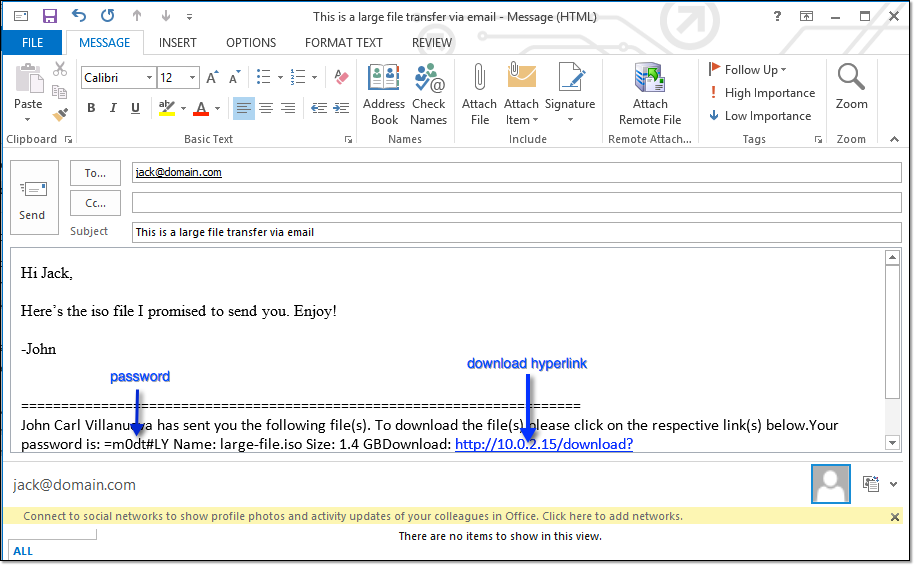
Immediately after, you should see a body of text appended to the main body of your email. This will contain:
- The complete name of the user you specified earlier;
- The optional password;
- The name and size of the file; and
- The download hyperlink.
On the other hand, if you want to send large files under the second scenario, simply click the Attach File button as you normally would.
Everything that takes place after will be exactly the same as a normal email composing/file-attaching/sending process. Everything related with the ad hoc file transfer process will operate behind the scenes.

As soon as you’re ready, click the Send button and let ad hoc file transfer do its thing.
I suggest you review Part 1 to recall what actually takes place in an ad hoc file transfer.
Read How to Send Large Files Through Email Part 1 , 2, 3, 4
Get Started
You can actually follow the steps on this post and learn how to send large files through email using the FREE, fully-functional evaluation edition of JSCAPE MFT Server.
Download JSCAPE MFT Server Trial